LED Tutorials - Cutting and Soldering RGB Neon Strips
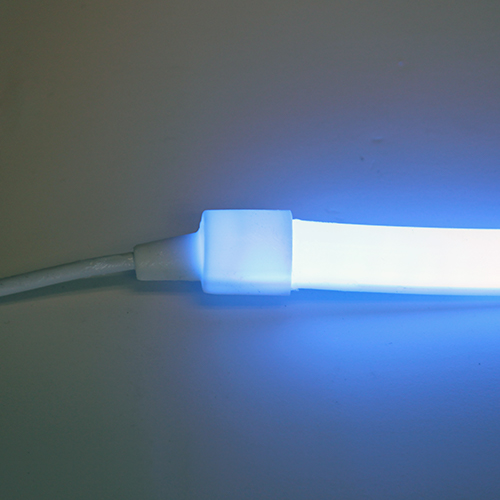
Our RGB Neon strip is a one of a kind product but requires a little bit of soldering and technical skills in order to cut, reconnect and reseal to keep an IP66 waterproof rating. Follow the steps below for best results when cutting and soldering our 24V RGB Neon Strips.
Click Here to see our RGB Neon Strip Light Click Here to see our Waterproof RGB Controllers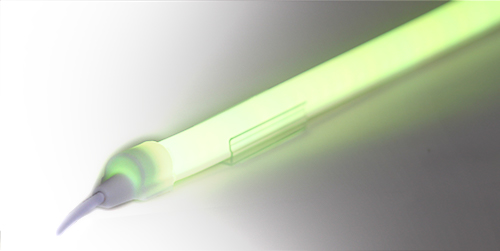
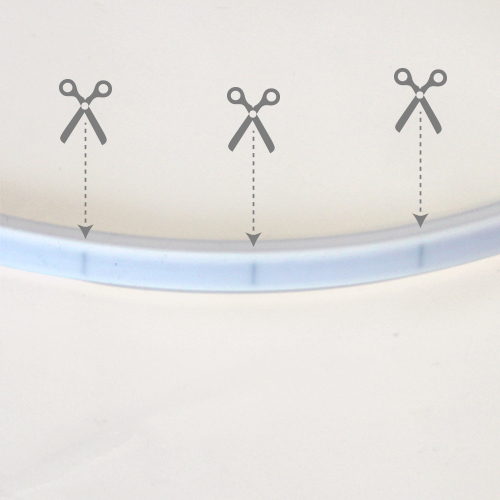
On the bottom of the RGB Neon Strip there are black marks that represent the products cut lines. If you cut outside of the cut lines that section of LED strip will fail to work. Determine the best cut point for your strip first off. DO NOT CUT UNTIL READING STEPS 2 AND 3!!!
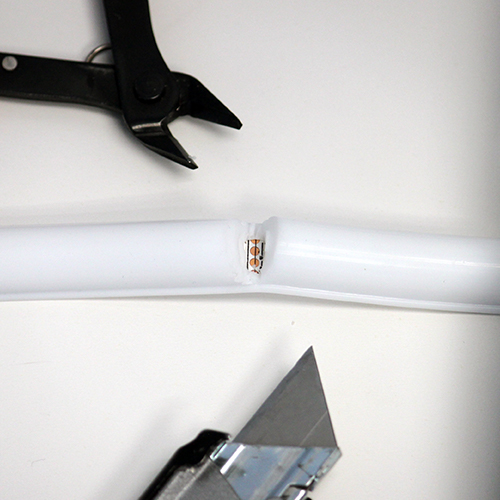
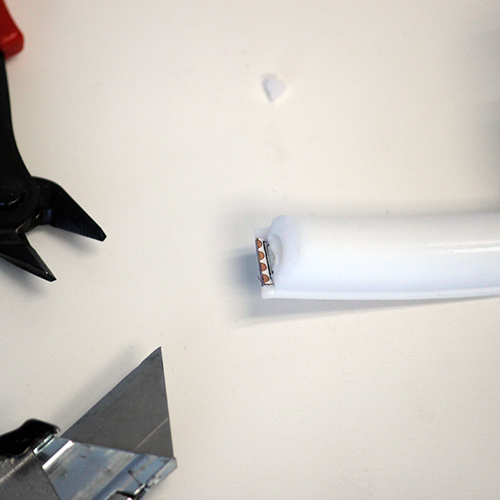
Due to the high density of this strip light the conductive copper pads are very small. In order to cut the strip with enough room to solder to it is best to first expose the cut line on the strip. To do this use a sharp razor blade and small snipping tool to cut a wedge out of the silicon cutting above the cut line. Disregarding this step can lead to a dead and non-conductive section of LEDs.
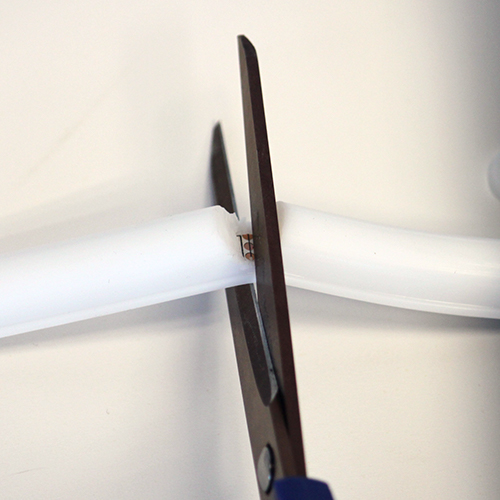
Using a sharp pair of scissors cut the strip light, directly down the cut line leaving enough room on the copper pads to solder. If the cut is off or your scissors are too dull it may make that section of LED strip unusable.
Now that the strip is cut you must cut back the silicon housing enough to solder your wires to the copper pads. This is done easily with a sharp razor blade and snipping tool. Do not cut too far back to where the end cap will not cover the strip light.
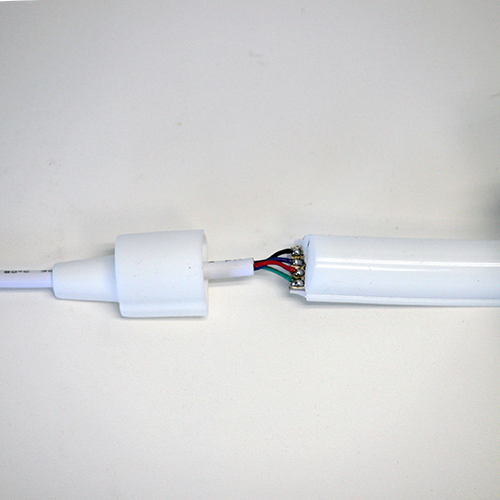
Once your strip light is ready to be soldered, tin the copper pads on the strip. Then use the extra wire lead with end cap to solder to the strip. Be sure to use the end with the small wire leads, you do not want your wires contacting each other after the end cap is applied. If you are not confident in your soldering skills be sure to test the connection before gluing the end cap.
After testing your connection you can now glue on your end cap. To make a proper seal and retain the IP66 rating use an outdoor rated, clear drying silicon adhesive.
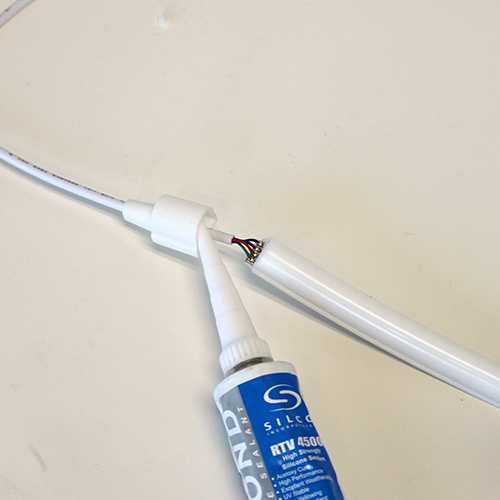
With the end cap applied and connected firmly you can now wipe any excess silicon adhesive and gum the commissure to your liking.
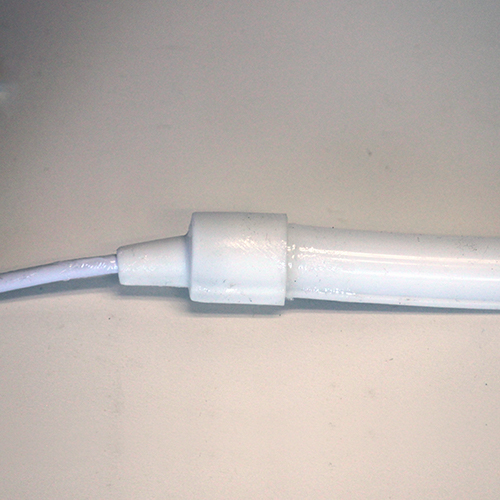
For good measure test your connection again and then let your adhesive set and dry before installation. It is best practice to hang the strip light so that gravity forces the adhesive into the cap while setting.
Related Categories
 RGB LED Controllers
We have a large selection of RGB LED Light controllers from basic knob style, programmable RGB controllers and several with remote control functions. You can use these RGB LED controllers to create unique lighting effects for your RGB LED lights, LED RGB Ribbon, RGB LED tubes, RGB Wall Washers, and LED RGB Modules. See our newly added RGBW (Red, Green, Blue, White) 4 color led controllers to mix color changing effects along with single color control white or warm white lighting.
These Amazing RGB LED Modules allow the light designer, set designer, sign maker and exhibit builder to easily bring their projects alive with color and movement. Using PWM dimming you can create millions of colors and color changing effects. Our standard color changing RGB modules are perfect for most projects, if you need color chasing module effects check out our digital style module options where you can control each LED module, making the possibilities truly endless. Module input voltages vary from 5VDC-12VDC, always be sure to operate the products on the correct input voltage.
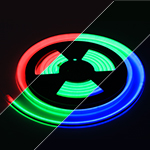 RGB LED Strip Lights
We have both uncoated and waterproof Flexible RGB LED Strip lights (RGB Tape lights) to choose from. Our color changing LED strips are very easy to use and are a very versatile way to add all the brilliant and amazing colors you get from RGB LED Strip Lighting. The combination of Red, Green and Blue output allows you to create millions of different color variations. Each roll of color changing strip is UL Listed for class 2 circuits, CE and RoHS approved.
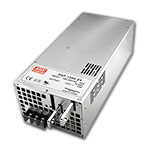 24VDC Constant Voltage LED Power Supplies
A variety of 24VDC power supplies capable of transforming a wide range of AC power to 24VDC power for usage with 24VDC LED products only. Use our Mean Well and Magnitude brand 24 volt transformers for powering our 24V LED strips, 24V LED fixtures, 24V Wall Washers, 24V controls and accessories.
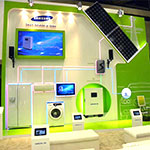 Customer LED Projects
Here you can see all of our customer's amazing LED lighting projects that were created using Ecolocity LED products and LED Lighting accessories. From LED Strip Light Projects to LED Wall Washer projects, our customer's have done it all. Browse these great finished projects to get some ideas for your next LED Lighting design.
 DIY LED Projects
DIY projects using LED Modules and LED Light Ribbon for easy to do and energy efficient, Do It Yourself lighting. These products can be used many different ways including under cabinets, under counters, cove lighting, in crown molding and even under stairs. These are some of the projects that we've done, if you would like to show us some of your projects we would love to see your ideas and input.